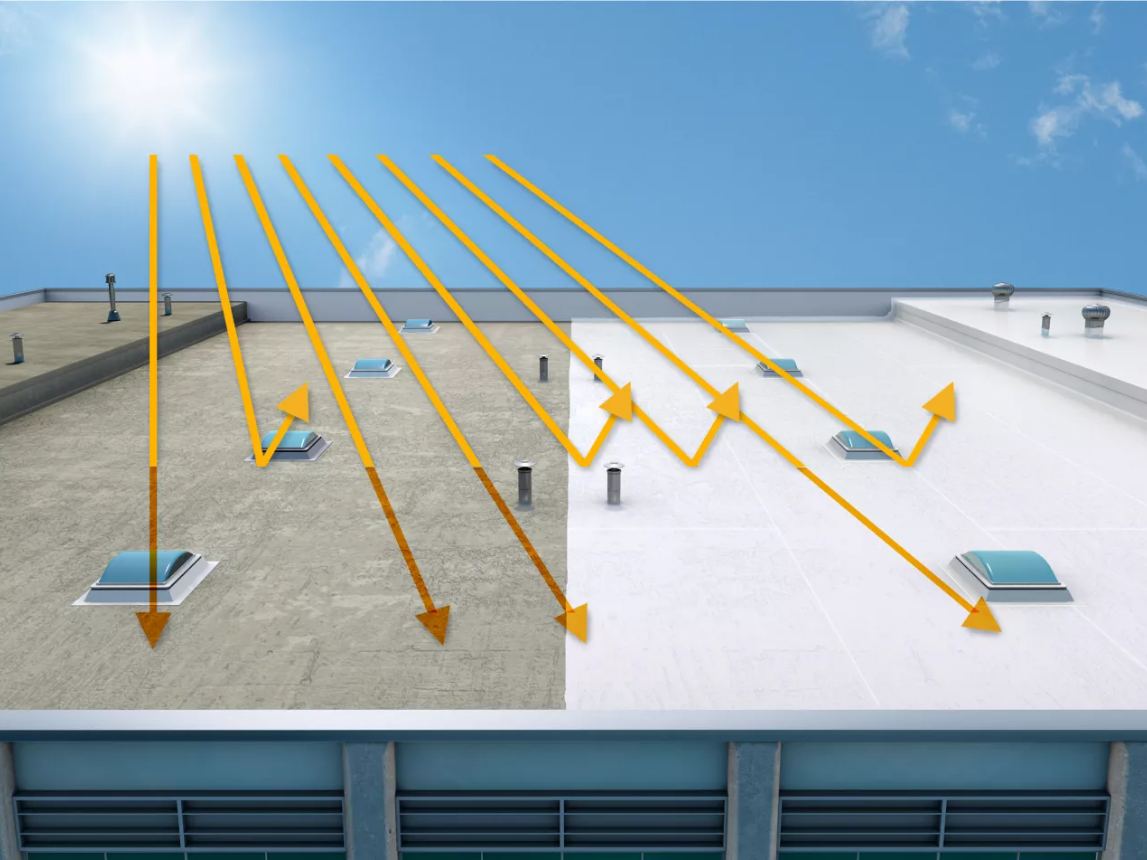
The summer sun can transform your home into an inferno, driving up energy bills and making daily living uncomfortable. Cool roof tiles offer a brilliant solution. These innovative tiles reflect sunlight and heat away from your building, keeping your interior cooler and reducing your reliance on air conditioning. This comprehensive guide empowers you to tackle this project yourself or prepare for hiring a professional. We’ll explore installing cool roof tiles and the specific benefits they bring to terraces, turning them into more enjoyable outdoor spaces.
Before You Begin: Planning and Preparation
- Choose the Right Tiles: Cool roof tiles come in various materials like reflective metal, ceramic, and concrete with special coatings. Consider factors like durability, weight capacity for your roof structure, aesthetics, and compatibility with your local climate.
- Measure Your Roof: Calculate the total roof area (length x width) in square feet for accurate material purchase. Include hips, valleys, and eaves for a more accurate estimate. Factor in a 10% buffer for waste.
- Gather the Tools: Safety gear like gloves, goggles, and sturdy shoes are essential. Tools include a hammer, drill, screwdriver, utility knife, metal snips (for metal tiles), and a level.
- Prepare the Roof Deck: Ensure your roof deck is structurally sound, free of rot or damage. Uneven surfaces may require leveling with appropriate materials. Existing asphalt shingles might need removal depending on the chosen cool tile system.
- Check Local Building Codes: Building codes might have specific requirements for cool roof tiles. Verify with your local building department to ensure your chosen tiles comply with regulations.
Installing Cool Roof Tiles: A Step-by-Step Guide
1. Underlayment Installation (if applicable): Some cool roof tile systems require an underlayment for waterproofing and additional heat proof tiles. Follow the manufacturer’s instructions for proper installation.
2. Batten Installation (if applicable): Certain cool tile systems utilize battens, which are wooden or metal strips nailed or screwed to the roof deck. Battens create a space between the tiles and the roof deck, allowing for ventilation and improved cooling performance. Ensure proper spacing as specified by the manufacturer.
3. Starting Row Installation: Begin installation at the lowest point of the roof, typically the eaves. Align the first tile according to the manufacturer’s instructions, ensuring proper overhang and a straight starting line. Secure the tile with nails or screws as recommended.
4. Subsequent Row Installation: Most cool roof tiles have an interlocking mechanism for easy connection. Follow the manufacturer’s instructions to connect subsequent rows, ensuring proper alignment and tight connections.
5. Cutting and Trimming: Use metal snips for metal tiles and a utility knife for some other materials to cut tiles for fitting around vents, pipes, or edges. Ensure all cuts are clean and follow manufacturer recommendations for secure fastening of cut tiles.
6. Ridge Cap Installation (if applicable): Many cool roof tile systems have specific ridge cap tiles to cover the peak of the roof. Install the ridge cap tiles according to the manufacturer’s instructions, ensuring proper ventilation and water drainage.
7. Safety First: Throughout the installation process, prioritize safety. Use fall protection equipment if working on a sloped roof. Double-check all connections to ensure a secure and weatherproof installation.
Cooling Tiles for Terraces: A Summer Oasis
Cool roof tiles aren’t just for rooftops! Consider installing them on your terrace to create a more comfortable outdoor space during the scorching summer months. Here’s why cool tiles are ideal for terraces:
- Reduced Heat Absorption: Cool tiles reflect sunlight and heat, keeping your terrace cooler and allowing you to enjoy the outdoors for longer periods.
- Improved Comfort: A cooler terrace translates to a more enjoyable space for entertaining, relaxing, or simply enjoying the fresh air without feeling like you’re stepping onto a sizzling pan.
- Energy Savings: By reducing heat radiating onto your home from the terrace, cool tiles can potentially lower your roof cooling tile costs.
The Final Touch: Maintenance
Once installed, cool roof tiles for terrace require minimal maintenance. Periodically sweep away debris like leaves or branches to maintain optimal performance. Consult the manufacturer’s instructions for any specific cleaning recommendations for your chosen cool roof tile material.
Conclusion: A Sustainable Investment for a Cooler You and Planet
Cool roof tiles are a win-win for your wallet and the environment. By reflecting sunlight and heat, they:
- Reduce energy consumption: Lower reliance on air conditioning translates to significant energy bill savings and a smaller carbon footprint.
- Improve indoor comfort: A cooler home means a more comfortable living environment, especially during sweltering summers.
- Extend terrace usage: Enjoy your outdoor space for longer with cooler surface temperatures.
- Reduce urban heat island effect: By reflecting heat away from buildings, cool roofs contribute to cooler cities.
Investing in cool roof tiles is a sustainable choice for a cooler you and a cooler home.